
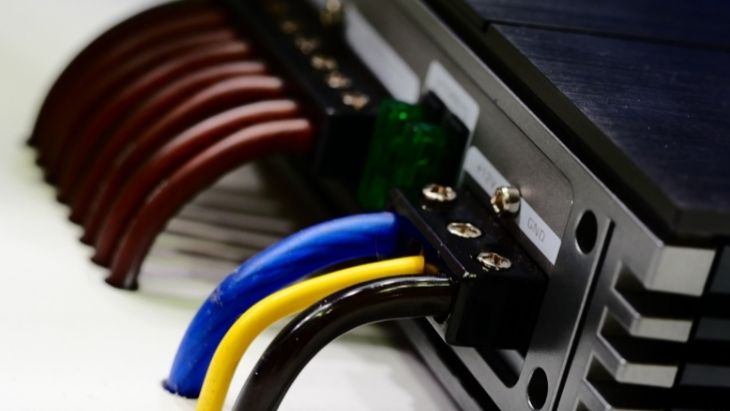
Installing a new Sony car stereo is relatively easy, and in most cases, the steps are simple enough for inexperienced users. However, considering that different car models come with varying specifics, the procedure for installing a new stereo may differ from model to model. As such, it is always a good idea to read your car manual before attempting to install your Sony car stereo.
Generally, if you’re planning to install your new aftermarket stereo, you’ll need to get a wiring harness that will plug onto the original factory wiring harness. Often, the factory harness is removed at the same time as the factory radio.
One of the most important things that you’ll need to have at your fingertips is information on specific Sony car stereo wiring color codes. Sony wiring codes are universal, so all you need to do is get a wiring harness and match your wiring color to color.
Sony Car Stereo Wiring Color Codes
| Wire code Function | Function |
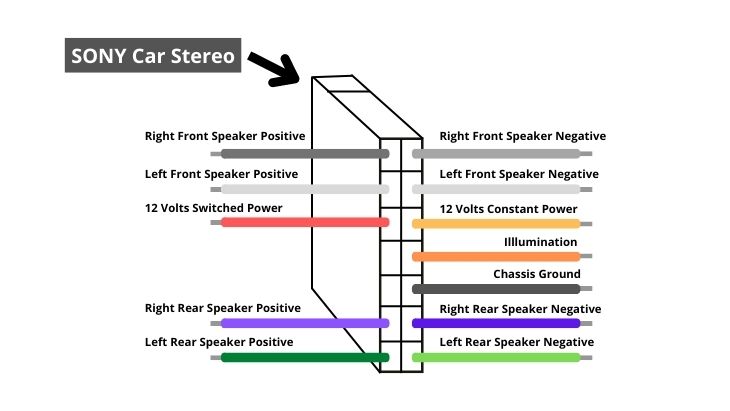
| White wire- left front positive White/ black wire- Left front negative Grey wire- right front positive Grey/black wire- right front negative | Connections for the front speakers |
| Green wire- left rear positive Green/black wire- left rear negative Purple wire- right rear positive Purple/ black wire- right rear negative | Connections for the rear speakers |
| Black wire | Ground |
| Blue wire | Remote turn-on |
| Red wire | The red wire represents the 12V accessory wire that helps to trigger the car stereo |
| Yellow wire | The yellow wire represents a constant 12 volts battery lead |
| Orange wire | The orange wire is used for illumination/lighting terminal |
In most cases, you’ll require a mounting kit to install your Sony or any other stereo for that matter. The kit may vary depending on the wiring structure of your vehicle, so you may want to ensure you gather all the gear you need for the job at hand.
A Typical Sony Car Stereo Wiring Diagram
Tips for connecting Sony car stereo
- Always ensure that the wiring harness of your specific car model is compatible with your new stereo. To be on the safe side, be sure to take a photo of your factory radio to act as a reference when wiring your new Sony stereo later.
- If you don’t prefer to use a wiring harness, then you’ll need to match the color codes manually. In such a case, you may want to study the wiring diagram before attempting to join the wires using either soldering or crimp connectors. You can also opt to get an adapter to connect the old wiring to your new car stereo.
- In the end, all wires need to be connected and if possible wrapped together using electrical tape. Under no circumstances should you leave any wire hanging or unattended
- Remember tight connections are critical to the optimal performance of your new car stereo. As such, make sure that the connections are not loose, as this could degrade the audio output. Also, ensure to fasten all screws that help to hold your radio in place.
Wrap Up!
There you go! We hope that our Sony car stereo wiring color code guide has made it easy to install your new car stereo. The best thing is that you can connect your car stereo wiring harness in the comfort of your garage without involving a professional. However, should you find yourself stuck or confused about which wire code to use, never hesitate to consult an expert—using the wrong wiring diagram could damage your car stereo or cause bodily injuries. Also, be sure to follow the specific installation instructions of your car model.
You may also want to read: Pioneer DEH S31BT Wiring Diagram with Color Codes
Michael Evanchuk is a San Francisco-based sound engineer with 20 years’ experience installing, troubleshooting, and repairing commercial, automotive, and household sound equipment. Evanchuk owns an auto stereo center, where he offers highly competitive car audio installation and repair services. He has written dozens of articles on different sound engineering topics, all of which have been published in leading journals, blogs, and websites.


