
Stock or factory car speakers are hardly pleasing to listen to, especially if you love listening to high-quality music. Even if some car speakers may sound a little bit good, you’ll still fail to get the kind of loudness and quality you need. Most factory speakers in cars have a minimum frequency range such that you’ll fail to hear some of your favorite frequency ranges. For instance, booming bass is out of the question with almost all factory speakers. Imagine going out with your friends for a car music competition and all you present are popping and crackling factory speakers. Wouldn’t that be embarrassing?
Well, there’re many reasons why it’s important to install new aftermarket car speakers. Aftermarket speakers come with the benefit of covering wider frequency ranges. You’ll also get to install powerful speakers according to your car’s audio needs. With aftermarket speakers, you can combine midrange speakers with tweeters and subwoofers for full-range audio performance. Factory speakers limit you on the kind of sound you can get, and that’s why you should install aftermarket speakers to experience the kind of sound you’ve been missing.
Upon getting new speakers for your car, you might be thinking of taking your car to a car audio center for speaker installation. However, that might cost you an arm and a leg. After all, you have already spent hundreds of dollars on the new speakers. Thus, it would help to save more money by installing the new car speakers by yourself. While this may sound challenging for first-timers, it’s not that difficult to do it yourself. You’ll only need some tools and a guide on how to get the job done. Read on through this article for simple steps on how to install a car speaker yourself.
Have the Right Speakers
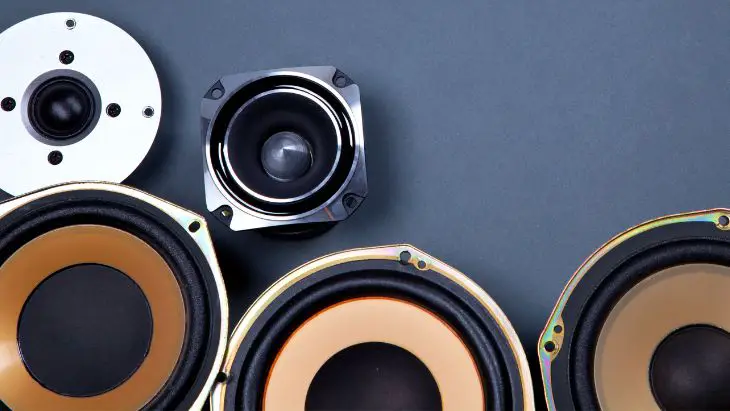
First and foremost, you need to get matching speakers for your car. Doing so will make the entire installation process much easier. You can take measurements of the existing speakers or read your car manual to get specifications of the speakers in terms of size. If you can’t get all that, simply visit the internet and search for your car model to get the size of the matching speakers. However, this shouldn’t limit you from installing a speaker size of your choice. You can still install any speaker size as long as it’ll fit in your car. You’ll have to create new holes to install extra speakers or speakers of a different size.
Also, consider whether you’ll be installing a component or coaxial car speakers. Component speakers may demand more effort to install since you’ll have to install tweeters, woofers, and mid-range speakers separately. Component speakers also require a crossover. As for coaxial speakers, they come as 2-way or 3-way speakers such that they have a woofer and tweeter all in one speaker framing, thereby making the installation work easier. Coaxial speakers also have inbuilt crossovers and this makes the installation process less complicated. The choice will be all yours depending on your preferences.
Tools Required for this DIY Job
Before getting started with the installation, you need to have all the required tools ready. These tools are readily available from local hardware stores. They’re also inexpensive, so you don’t have to worry about getting them. You might even have some of these tools at home already. Here’re the tools you need to gather before getting started.
- Screwdriver set
- Allen wrench
- Torx driver
- Socket wrench set
- Allen wrench set
- Panel removal tool
- Wire cutter
- Crimping tool
- Electric dill
- Electrical tape
- File
- Hobby knife
- Soldering kit
- Retaining clip remover
- Cable ties
- Temporary marker pen
Precaution Measures
Once you have the speakers and tools ready, it’s time to get started. The first thing you should do is disconnect your car battery. Doing any electrical work in your car requires electrical flow to be turned off to prevent shorting any components or electrical shock. Since most electrical components in cars are connected to one grounding or –ve terminal, it means that all the speakers may have a direct connection to the car battery. Thus, avoid any costly damages and injury by disconnecting the battery as the first step.
You’ll also need to take care of the wiring. In most cases, factory wiring comes with color codes. When installing speakers, you’ll either cut out the factory wire and connect it to the new speakers or use a plug to connect the factory wiring to the new speakers. You might also have to do the wiring from the new speaker all the way to the crossover or receiver. Whichever way, you’ll need to get the wiring right to avoid shorting and damaging any component. In standard wiring, the black wire gets connected to the –ve terminal whereas the white or solid wire gets connected to the +ve terminal. Whichever color coding you’ll find in your car, match the terminals correctly, and don’t attempt to reverse the polarities.
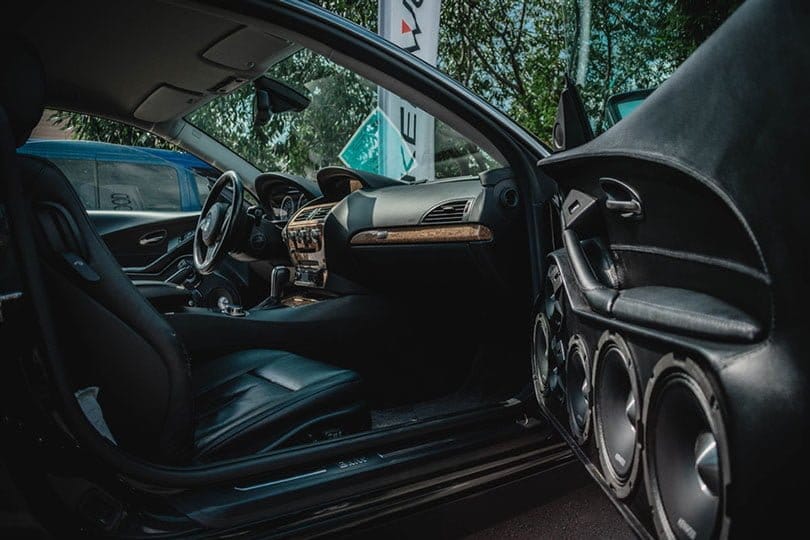
Installing Car Speakers in the Door
You’ll hardly miss finding speakers at the doors. Whether you have door speakers or not, the door is one of the best locations to install car speakers. After all, getting great car audio requires having door speakers. Moreover, they’re relatively easy to install. Here are the steps to follow when installing car speakers in your car door.
1. Removing the factory speaker
If you have matching speakers, you’ll only need to remove the existing speaker and install the new one. First, remove the grille by removing any screws or fittings holding it in place. Once the speaker is exposed, you’ll need to remove any screws holding it in place. Be careful when removing the speaker as it may be connected to a wiring assembly that you may want to reuse with the new speakers. In some cases, you might find that the speaker is mounted with a type of foam rather than screws. If this is the case, cutting the material using a knife will detach it.
2. Connecting the wiring assembly
Upon removing the wiring assembly from the stock speaker, attach it to the new speaker. Ensure that each speaker terminal is connected to the correct polarity. In case there’s no wiring assembly, you might have to solder the existing wire onto the terminals of the new speakers.
3. Attaching the new speaker in place
Once you’ve confirmed that the polarities are properly connected, you can insert the speaker into the speaker hole and screw it in place. Then attach the speaker grille in place. Once done, repeat the procedure for any other door.
Well, that sounds quite easy. Doesn’t it? If you’re installing a matching speaker, the installation process is simple and straightforward. However, if you want to install custom speakers or speakers that don’t match the existing speaker hole in terms of size, then you’ll need to remove the door panel. Also, you might have matching speakers but they can’t be removed without removing the door panel first.
Removing your car door panel

Most old-school cars have a manual type of windows that operate manually using a crank. To remove a door panel in such cars, you’ll start by removing the crank. Check for a screw holding the crank and remove it. Then you can start removing the door panel. Some door panels are held in place with screws while others use spring clips. Most modern cars have door panels held in place with clips. You’ll need a retaining clip remover to detach the clips.
If your car has electronic windows and locks, you’ll need to remove the control module when removing the door panel. You’ll most likely find the module around the armrest area of the door. Once done, check for any clips or screws that may still be holding the panel in place. Use a panel removal tool to detach the panel once you’re sure that no module is connected.
When removing the panel, it’ll help to start from one bottom corner while pulling the panel outwards with the panel removal tool. Use the tool carefully to avoid damaging the panel. Thus, take your time and do it slowly without any rush.
Once a corner is loose, continue pulling along the bottom until both bottom corners are unhooked. Once the bottom section is unhooked, the rest of the panel will come off easily. Once done, you can install the matching speaker that couldn’t be installed without removing the door panel. If you need to modify the panel to fit custom speakers, then read on.
Cutting New Speaker Holes and Installing Custom Car Speakers
Sometimes, you may want to install a speaker that cannot fit in the stock speaker hole on the door panel. Now that you have already removed the door panel, you can go ahead and learn how to cut out new speaker holes.
Step 1- Choose the mounting location
You can choose to mount the speaker at the top or bottom section of the door panel. Mounting at the top section takes less time and effort than mounting at the bottom section. However, you’ll choose to cut new holes on the section of the door that’ll suit your car and preferences.
Before cutting any hole, check whether the speaker will fit in that area. Check whether there’re obstacles behind that section. You can place the speaker over the door and see whether it’ll fit in that section.
Step 2- Cut out a new mounting hole
Once you’ve spotted the best door section to fix the speaker, double-check to confirm that cutting out a hole around that section will not affect any door or car functionality, especially the door locks and windows. You can check the room that’ll be left between the speaker and the window when it’s rolled all the way down. If there’s enough room, then you have the best spot for your new speaker.
You can now start taking measurements of the hole to cut out. Trace the shape of the speaker over the desired mounting location. Use a temporary marker pen to make the sketch. Don’t use a permanent marker pen since the ink won’t come off until the next time you repaint your car.
Next, lay the door panel on a flat surface and cut out the traced shape with a sharp, sturdy utility knife. Cut out the shape slowly and carefully.
You’ll need to use a jigsaw to cut out any metal surface. Be cautious when cutting out a metal surface. Wear protective gear such as eye protection. Cut out the metal surface carefully without causing any damage.
Only cut through the panel and metal frame one at a time. Cutting them together may rip out other door parts. Vacuum any debris upon cutting the frames.
Step 3- Do the wiring
Before installing the new speaker, it’d be better to do the wiring first. Run the cables through flexible tubing to keep them protected. Ensure you do the wiring in a way that it won’t get squeezed by any door part. Run the wire from the speaker area to the nearest plug, else run it to the crossover or receiver.
Step 4- Installing the speaker on the door
Position the speaker in place and mark locations for new screw holes. Then drill the marked screw locations using a drill. Next, fix the speaker in place and connect the speaker wires to their respective terminals. You can drive some screws through the speaker to temporarily hold it in place for testing in the next step.
Step 5- Test the speaker
At this point, reconnect the car battery and turn on your car stereo to test the speakers. If they’re sounding right, then you’ve done everything the right way. Once you’ve confirmed that the speakers are properly connected, you can disconnect the battery again and put everything back in place. Ensure you reattach any wiring modules you removed from the door before screwing everything in place. Screw the speaker firmly in place and reattach the door panel. Then attach the speaker grille to hide and protect the speaker cone.
Installing Car Speakers in the Dashboard
Another great location to install speakers is the dashboard. Most cars already come with dash speakers. Get a replacement speaker of the same size as the factory dash speaker. You can easily remove the factory dash speaker by detaching the grilles first and then detaching the speakers. Most grilles are held in place by screws or friction fittings. Remove them carefully to avoid damaging the dash.
You can use a panel removal tool to pry off any fittings holding the grilles in place, but avoid scratching or cracking the dashboard. Once done, detach the stock speaker. Note how the polarities are connected. Then attach the new speaker to the old one in the correct polarities. You can either crimp or solder the wire in place depending on the setup you want or the existing factory setup.
Once done, you can test the speakers before screwing everything in place. If they sound right, wrap the wire connections on the terminals with electrical tape. Add cable ties on the tape to ensure it won’t melt due to heat.
Now screw the speaker in place and reattach the grille. You may want to test the speakers again to confirm that everything is still okay.
Installing Rear Car Speakers and Woofers/ Subwoofers
Rear car speakers vary a lot, especially based on the car model. The design of your car will largely determine how you’ll install them and the effort required. In some instances, you’ll simply remove the existing speakers and install the new ones. However, in other cars, you’ll have to disconnect existing speakers from within the trunk or after removing the back seat. Woofers and subwoofers are also best installed in the rear part of your car. Regardless of your car design, we’ve got you covered. Here’s how to install rear car speakers, including woofers or subwoofers.
Step 1- Removing the factory rear speakers
Start with removing the factory rear speakers. The removal process will depend on their location. If they’re hidden within the trunk, you’ll need to get into the trunk to access them. Simply remove the grilles, then unscrews the speakers and detach them.
If the rear speakers are hidden in the back seat area, you’ll need to push the bend the seat forward to access the speakers.
Step 2- Connecting the new speaker
Connect the new speaker and remember to connect the polarities correctly. Once done, screw the speaker temporarily for testing.
Step 3- Testing
Test the new speaker before attaching everything back in place.
Installing Component Car Speakers
Component speakers are always the best choice when you want to get full-range sound in your car. This will mean installing woofers, mid-range speakers, and tweeters. Note that component speakers have to be wired to the crossover for the best sound balancing.
Here’s how to install component car speakers.
Step 1-Choosing the locations
First, choose where each speaker will go. Midrange speakers can be installed on the doors and dashboard. Woofers or subwoofers can be installed on the rear part of the car or even in the trunk for larger woofers and subwoofers. Twitter can be installed anywhere around the car. You can have one at the front and another at the rear for the best sound balancing.
Step 2- Installing the component speakers
Mid-range speakers and standard woofers can be installed in the doors using the already mentioned steps for installing car speakers in the doors. In most cases, installing component speakers may demand cutting new holes, especially for the woofer or subwoofer. You can also install a woofer or sub in the trunk by simply adding it to a cabinet. You’ll simply tuck the cabinet somewhere in the trunk and do the wiring.
If you’re installing a woofer in existing holes, you may want to add a mounting bracket if the woofer doesn’t match the size of the existing hole. You’ll also need to place a buffer between the bracket and the woofer.
Installing Tweeters
Tweeters are quite easy to install. You can use choose between mounting them on a panel and putting them under a factory speaker grille.
Option 1- Installing tweeters on the door panel
The best panel area to mount a tweeter is the door panel. This will also make the wiring process easier. You may have to remove the door panel for wiring.
Once you have removed the door panel mentioned earlier, trace the diameter of the tweeter on the preferred location on the door panel. Use a temporary marker pen to trace the diameter. Then cut out a hole from the traced diameter.
Next, slide the base cup with the tweeter into the newly cut hole. Then insert the tweeter cable through the base cup such that the cable goes into the back area of the door panel. Then wire the cable to the crossover or receiver.
Once you’ve wired the tweeter, put the door panel back into position. Next, insert the tweeter into the base cup. Basically, the base cup holds the tweeter in place.
Option 2- Installing tweeters under a factory grille
If you have unused factory grilles, you can take advantage of them to install tweeters. This way, you won’t have to cut out any new holes. You’ll simply remove the grille and add a speaker bracket for the tweeter to fit in.
If you’ll be adding a bracket, you’ll cut out a hole through the bracket that is of the same diameter as the tweeter. Then insert the base cup of the tweeter. Next, wire the tweeter to the crossover. You might have to pry off some panels when doing the wiring to access the crossover.
Once you’re done with the wiring, test whether the tweeter is sounding right. Then reattach any panels you pried out. Next, insert the tweeter into the base cup you already installed. Once done, reinstall the grille to hide the tweeter.
In Conclusion
As you can see, you don’t always have to pay someone to get a job done. Some tasks such as installing car speakers are DIY jobs. You’ll only need to have the right tools, pry out any panels carefully, cut out new holes if need be, and wire the speakers correctly. You’ll also choose between installing components and coaxial car speakers. Always remember to test out your speakers before attaching everything firmly in place to make it easier to rectify any mistakes. With these tips and steps on how to install car speakers yourself, you’ll end up finding it fun to always do it yourself.
Michael Evanchuk is a San Francisco-based sound engineer with 20 years’ experience installing, troubleshooting, and repairing commercial, automotive, and household sound equipment. Evanchuk owns an auto stereo center, where he offers highly competitive car audio installation and repair services. He has written dozens of articles on different sound engineering topics, all of which have been published in leading journals, blogs, and websites.


