
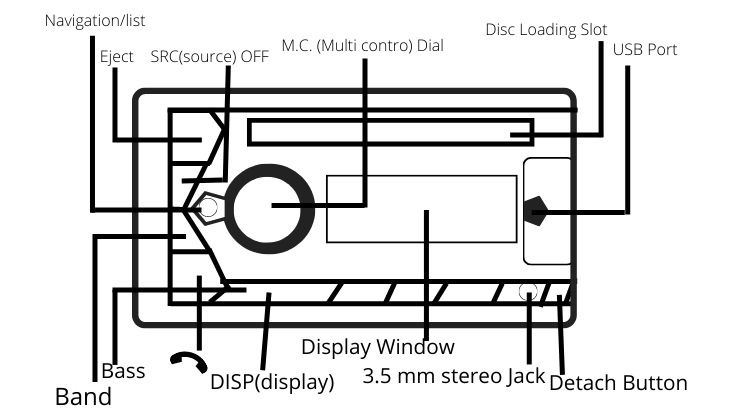
Pioneer DEH S31BT is an affordable single din in-dash car stereo receiver that allows you to enjoy your favorite jams while driving. The DEH S31BT is designed to pair seamlessly with any Bluetooth-enabled device without the need of going through complex settings. What’s more, this receiver is compatible with Pioneer’s proprietary Smart Sync app that helps you navigate your phone’s functions with the touch of a button.
Additional features include;
- Hands-free calling and voice messaging
- Built-in Alexa
- Compatibility with Android music
- Up to 50 max watts per channel (up to 4 speakers)
- LED backlight
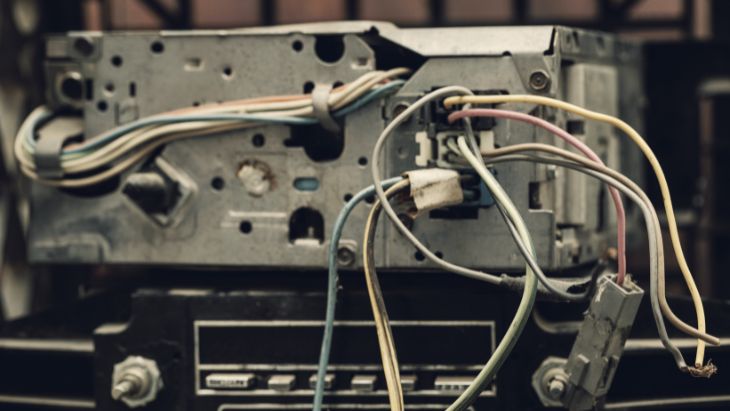
Installing the DEH S31BT can be tricky, but this will depend on your car’s factory settings. So before you install your head unit, you may want to check your car model for fitment. Furthermore, your car model will dictate which wiring harnesses, dash kit, and any other additional components you need for the installation. Learn the difference between a single din and a double din here.
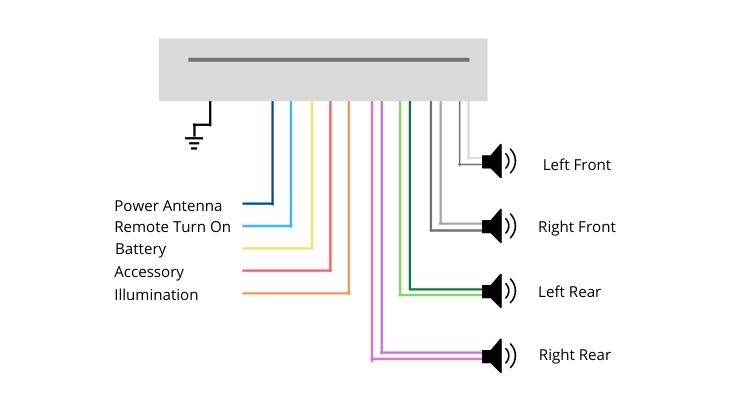
Pioneer DEH S31BT Color Codes
The Pioneer DEH S31BT offers a wiring diagram that indicates the purpose of each wire and where each wire needs to be connected. However, you can make the process much easier by getting a wiring harness adapter. The adapter allows you to tap into your existing wiring harness while allowing you to minimize common wiring mistakes. That said, Pioneer DEH S31BT color codes include;
- Red wire – is the 12 V ignition wire; you’ll need to hook this wire to the red wire of your car.
- Yellow wire—12 V battery wire which is attached to the battery for power
- Black wire—acts as the ground wire which corresponds with the ground wire of the car. If your vehicle does not have a ground wire, you’ll need to secure the ground cable to the body of the car, preferably a bare metal, which will act as the ground.
- Blue wire—Acts as the power antenna/ remote turn on. Ideally, this wire tends to be much thicker, and it only reconnected after you install your head unit.
- Orange wire—this wire is basically for illumination/dash light. In some wiring harnesses, you may have an orange wire with white stripes, which allows you to use a dimmer.
- White wire—Left front speaker (positive)
- White/ black stripes wire—left front speaker (negative)
- Grey wire – Right front speaker (positive)
- Grey/black stripes wire—Right front speaker (negative)
- Green wire—Left rear speaker (positive)
- Green/ black stripes- Left rear speaker (negative)
- Purple wire—Right rear speaker (positive)
- Purple/black stripes wire—Right rear speaker (negative)
Pioneer DEH S31BT Wiring Diagram
Once you’ve matched all the wires to their corresponding wires in the wiring harness, you’ll need to find a way of establishing permanent connections. There are many methods you can use to bond the wires, and the good thing is that most methods are easy to learn. These include;
- Using a solder and soldering iron to join two wires together. For this method, you’ll only need to use the soldering iron to melt the solder onto both wires. As the melted solder cools, it sticks the wires together thereby creating a permanent bond.
- The second method you can use to join the wires is by using crimp connectors. Crimp connectors use the same principle as the soldering method, but instead of applying heat, the former requires you to use a crimping tool (e.g. a plier) to twist the wires together.
- Alternatively, you can use your fingers to twist the wires together and use a heat shrink tube to cover the twisted section. You may also want to ensure that no wire is left uncovered by wrapping them together using electrical tape.
Also Read: 2 Channel Amp Wiring Diagram- Complete Guide
Conclusion
Adding an aftermarket car radio gives you an opportunity to explore new entertainment experiences and breathe new life into your car stereo. Installing Pioneer DEH S31BT can be a bit tedious, but it is important to take your time and approach the process with patience. The good thing is that the user manual is very straightforward, but it is always a good idea to consult an expert in the field.
Michael Evanchuk is a San Francisco-based sound engineer with 20 years’ experience installing, troubleshooting, and repairing commercial, automotive, and household sound equipment. Evanchuk owns an auto stereo center, where he offers highly competitive car audio installation and repair services. He has written dozens of articles on different sound engineering topics, all of which have been published in leading journals, blogs, and websites.


