
You have chosen the best marine stereo for your boat or yacht.
Congratulations!
Installing it properly is the next crucial step toward enjoying great audio when out there on the lake or sea.
The ultimate aim of this marine stereo installation guide is to provide you with all the steps – from when you unbox your replacement unit to powering it up for a test. It will walk you through choosing installation locations for the system, installing the receiver and its speakers, and getting around the wiring.
Is installing a replacement marine stereo difficult?
How easy/short or long/challenging the installation is going to depend on two factors.
First, how similar or different is the replacement stereo compared with the older unit? If it’s the same type, and with a similar design, you can simply drop the old stereo and install the new one.
The replacement unit is not of the same type as the older unit. Granted, wiring can be a whole lot of mess when doing audio installations. You should not worry much even if the two units aren’t of the same model or brand. Most stereos nowadays use a generic configuration that you can figure out quite easily.
Secondly, do you have experience with audio equipment installation? If yes, can you find all the tools needed for a successful installation? If you cannot carry out the installation on your own, there’s no harm in asking for help from someone who has the knowledge and expertise.
Alright. It’s time to get the hands working. You’ve unboxed your replacement marine stereo. Here is a step-by-step flow of the installation process:
Step One: Determine where you want to install the stereo
Some boat manufacturers design a pocket for stereo installation. This might have been where the previous unit sat. If your replacement unit is exactly the same type and size as the old one, you can just swap the plugs and you are good to run it through a performance test.
If your boat doesn’t have this bracket, you can choose another suitable place to install your radio. There isn’t a single location that can be considered to be the best installation space for marine stereo. One location might be great for a fishing boat yet bad for a motor boat. Each boat model has its space and power peculiarities.
Where does a“blackbox” marine receiver fit?
This type of digital media receiver is designed for out-of-sight installation. Usually, they feature rugged, waterproof controllers with which you can access all connectivity and audio control functions of the receiver.
If you chose a “black box” receiver because you knew that finding a convenient place to install a marine stereo in your boat would be an uphill task, feel free to install it anywhere as long as it’s not exposed to water splashes.
Step Two: Determining where to put subwoofers and the amplifier
Under-seat and under-the-bow compartments are ideal installation spaces for the marine speakers and amplifiers that come with the stereo system. Some people consider a wakeboard tower a good place for these components as well. The decision of where to put the tweeters, midbass, and midrange speakers depends on the shape of your boat as well as your listening tastes and preferences. These drivers can sit pretty inside the dash panel or side panels.
Step Three: Where is the ground?
Some boats have dedicated grounding plates, so you’ll find a perfect place to ground your stereo if you are dealing with such a boat. In some boats, however, knowing where to ground your equipment can be challenging. The boat’s manual could provide you with more information on the manufacturer’s preference for a grounding place.
Step Four: Actual installation of the receiver
Bracket-mounted marine stereos
Installing bracket-mounted stereos is pretty straightforward. You can place them anywhere on the boat since they come properly sealed for waterproofing. The only disadvantage is that they take up more space on your boat compared to flush mount stereos.
Flush-mounted stereos
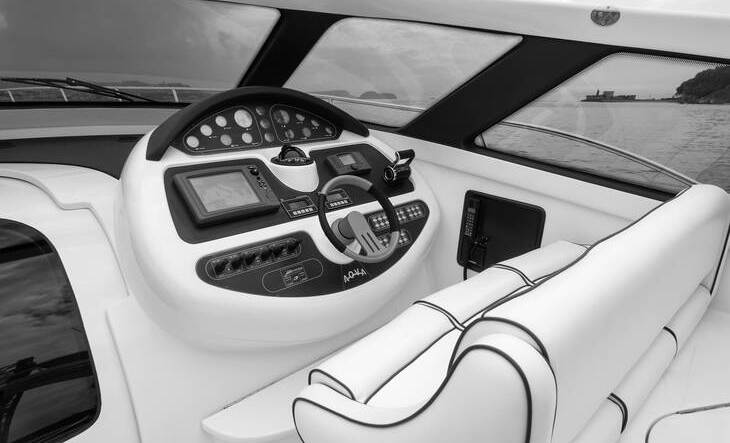
Flush-mounted stereos require you to cut a hole into the panel. A popular spot for the installation of this kind of marine stereo is on top of the console above the steering wheel. Here, the unit is protected from small splashes by the console’s windshield.
Normally, the stereo’s manual will contain directions on how to measure the installation space that the stereo needs. After doing this measurement accurately, cut out the hole using a jigsaw.
Insert the replacement stereo into the factory bracket or cut-out hole. Ensure that the outer edge of the stereo’s face plate sits properly on the panel and that there is enough space for drilling screws to fasten the unit securely on the panel.
The mounting surface is not flat enough for a watertight seal. What should I do?
In this case, use a small amount of silicone caulk to fill any spaces that might not have been sealed.
Drill rust-resistant screws into the panel and secure each with lockouts. The unit should be tight enough to hold in its mounted place through the roughest rides. Silicone caulk prevents water from leaking to the stereo’s rear.
Some receivers come with a rear hanging support bracket that you can place on the inside of the mounting panel. Running the screws past the panel and into this support material facilitates a stronger installation.
What’s the best inclination angle for the receiver?
In most cases, the angle of placement won’t be a big deal. If your stereo plays CDs, however, the unit should be mounted not more than 20 degrees. A greater angle of inclination could lead to loss of shock absorption that’s built into CD player models. When you hit waves, the CD could slip out and potentially damage the stereo’s internal components and circuits.
Step Five: Installing the speakers
Hopefully, you chose a good installation location for your marine speakers – where they will remain dry while delivering optimized sound quality.
The sides of the center console make it a popular place for boat speakers. Again, if your speakers are bracket-mounted, the installation work is simple. For flush-mounted speakers, you’ll have to make holes in the chosen installation locations. Remember to use the manual when measuring the dimensions of the holes. Round speakers require precisely-cut holes, which are harder to achieve than rectangular or square holes.
Once the holes are ready, insert the speaker carefully and let its cover overlap the hole to conceal where the hole was not smoothly cut. Mark the spots for screw holes. Remove the speaker so that you can drill screw holes. Then, re-insert the speaker, drive in the supplied screws and secure with the locknuts.
Step Six: Connecting the stereo to the power source and to the speakers
You are just one step from testing your replacement stereo. The receiver and speakers are in place. What remains is running wires to the right places. Noteworthy, proper wiring will ensure that you get the best quality sound and you won’t experience annoying disruptions when enjoying your favorite music and radio shows.
Let’s get right into it.
Examine all the color-coded wires protruding from the back of the stereo. Connect the yellow wire to the positive terminal of the battery and the black one to the negative battery terminal. The black wire is also the ground wire. You are left with the red wire and the blue one. The red wire connects to the ignition. It’s a switched power wire. Connecting it this way ensures that the stereo turns on/off when the boat’s ignition is turned on/off. Finally, the blue wire connects to an external amplifier.
All the remaining wires are for connecting the stereo to the speakers. Each speaker connects to a uniquely color-coded set of two wires originating from the stereo. For example, one set may be colored brown meaning they go to the same speaker. Another one can be coded with purple, meaning they go to a second speaker. In each set of 2 speaker wires, the one with a solid color is the ground, and the other one is the hot wire.
At the back of each speaker, you’ll see clear indications of where the two wires (hot wire and ground) go. Connect the wires accordingly from the stereo to each of the speakers.
Final step
Turn on the power and test your replacement marine stereo.
Wrap up
You are lucky if the replacement stereo resembles the previous unit in design and size. You can simply use the same mounting location not only for the radio but also for the speakers. Probably, you can use the same wiring if it’s still in good shape.
Otherwise, that jigsaw in your garage is going to get some work. You need to make new installation spaces or reconfigure the old spaces.
It’s important to remember that many marine receivers are designed to the standard single-DIN size. This implies a 2-inch height. Thus, choose your installation location with this size at the back of your mind. Also, most marine stereos work with a 12V battery, which is the almost universal battery size for most vehicles and boats.
So, is installing a replacement marine stereo something you can do on your own? If you think it’s challenging in some or all aspects, it’s only wise to seek professional stereo installation help.
Michael Evanchuk is a San Francisco-based sound engineer with 20 years’ experience installing, troubleshooting, and repairing commercial, automotive, and household sound equipment. Evanchuk owns an auto stereo center, where he offers highly competitive car audio installation and repair services. He has written dozens of articles on different sound engineering topics, all of which have been published in leading journals, blogs, and websites.


