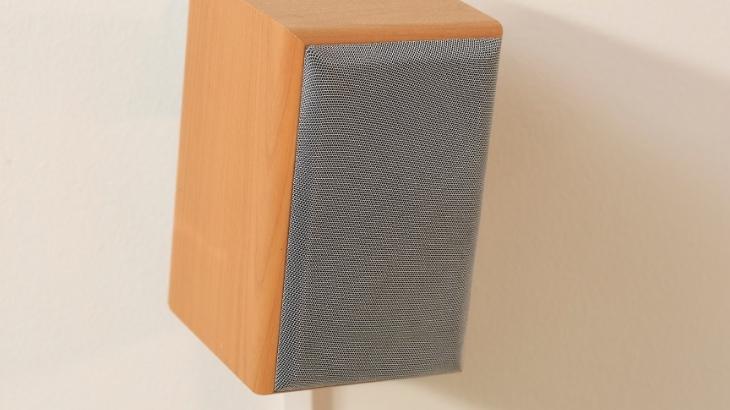
For many home audio setups, you find that the sound quality gets improved when you mount speakers on a wall. That is why you should consider mounting your speakers on the wall, including outdoor speakers. However, you may be wondering whether it is possible to mount heavy speakers on a wall. Yes, it is possible. In this article, we will show you how to mount heavy speakers on a wall.
Benefits of Mounting Heavy Speakers on a Wall
Before we get started on how to mount your heavy speakers on the wall, it will help to learn more about the benefits of this idea in the first place. Essentially, heavy speakers are often heavy-duty and large-sized. It is likely you spent a lot of money purchasing them. Thus, you will want them secured in the best way possible. Here is why you should consider mounting them on the wall:
1. Enhanced protection
By mounting speakers on the wall properly and securely, your kids, family members, and pets will be safe from bumping into the speakers that would otherwise be lying around on the floor. Also, it keeps cabling more neat and secure. Besides, the speaker cones are protected from damage.
2. Improved sound quality
By wall mounting your speakers, you will enjoy improved sound quality. The reason is that the height makes it possible to eliminate reflections from objects such as coaches and furniture that often interfere with the sound quality.
3. Saves on space
Keeping your living space clutter-free makes it look neat and organized. You can reduce clutter by mounting speakers on the wall. Also, if your living area has limited space, you can save on space by mounting your speakers on the wall.
How to Mount Heavy Speakers on Wall
If you have just moved into a new home featuring a challenging layout to work with, your best bet is to hand your speakers around the walls. Also, if the floor space is limited, hanging the speakers on a wall is a great consideration to make.
Mounting in-wall speakers or mounting them on a wall is something that many audiophiles consider. However, most of them only mount light speakers and tweeters due to limited floor space or for convenience.
The idea of mounting heavy speakers on a wall is thought to be impossible by some people. However, it is doable, though quite challenging. If you are considering mounting heavy speakers on the wall but wondering how to go about it, read on to find out.
Tools and Supplies Needed:
Before attempting to mount heavy speakers on your walls, there are certain tools and supplies you will need including:
- Mounting hardware
- Stud finder
- Speaker mounts
- Speaker cable
- Speakers with threaded mounting points facing the bottom
- Cordless drill and a ¼” or 5/16” drill bit
- Wire stripper
- Wire cutter
Mounting speakers on the wall is a great learning experience, especially for a first-time DIY enthusiast. If you have mounted in-ceiling speakers or in-wall speakers before, you will find this process quite simple. Here is how to go about it.
Step 1- Choosing the correct mounts
You should start by ensuring that the speakers are mountable. Essentially, some speakers feature mounting slots or mounting holes. Some do not have any mounting holes and cannot be mounted on a wall.
It is also important to ensure the mounting holes match the mounting brackets you will be using. Thus, check the kind of mounting holes available on your speakers before buying mounting brackets.
Since you are set to mount heavy speakers, ensure the mounts are strong enough to support the weight of the speakers.
Also, it will help to choose flexible wall mounts. That way, you can rotate, tilt, or turn the speaker as needed.
Step 2- Identifying the best mounting location
It is important to plan for the speaker placement and positioning properly. Know where you want to mount the speakers before getting started. The last thing you will want is to change their mounting position after you have already drilled several holes in your wall.
Additionally, it is important to ensure that the speakers are mounted at least 2 feet away from the corners. Also, ensure the speakers are positioned where they leave clear views of any doors and windows. Generally, rear speakers should be mounted at the same height as front speakers for balanced sound output.
Another consideration to make is the path you will run the speaker cables after settling on the best mounting locations for the speakers. Take measurements of the cable paths to ensure you buy enough speaker cable length. Add about 15% of the cable length you have measured when buying the cable to take care of any lost length due to possible wiggling.
Step 3- Mounting the brackets
Some speakers come with a wall mounting kit. In such cases, you should check and follow the instructions that came with the kit.
Before attempting to mount speakers on a wall, ensure you take care not to drill through electrical cables. Start by checking the location of any conduits, electric pipes, and other hazards with the help of a stud finder.
Next, mark speaker mounting holes on the wall with the help of a cardboard template. If you are drilling holes on a drywall, only drill them into studs. Use a stud finder to check the location of the studs.
The anchors you will choose will determine whether you will drill ¼” or 5/16” holes. Sometimes, you may have to tap the anchors with the help of a hammer when using ¼” holes. However, tap the studs very gently.
Step 4- Mounting the speakers
Next, you will need to mount the speakers upon mounting the brackets. If the speakers have threaded studs, you will find it easier to mount them than unthreaded studs. Check the back of the speakers to determine whether they have threaded holes. That way, you will know the size of the studs needed.
Once you have the right studs, insert them into the mount. Turn the stud to ensure it bottoms out. Make sure you mount a safety strap on the speaker to prevent it from falling during the mounting process. Next, attach the speaker in question to the stud. Then tighten the stud.
Position your speaker properly and ensure the stand mounts against the thread. Use mounting screws to secure the speaker on the mounting studs. Upon finishing the mounting process and ensuring you have mounted the speaker securely enough, adjust it to the desired angle. Test each speaker to determine whether you need to make any further adjustments.
Conclusion
Mounting heavy speakers on the wall can be quite challenging, especially if you are doing it for the first time. However, with the right mounts and by choosing the best mounting locations, you will find it easier to mount the speakers securely. Also, ensure you follow our step-by-step guide on how to mount heavy speakers on the wall to help you get the job done successfully. Once you are done mounting the speakers on your walls, you will have a more enjoyable listening experience, save on space, reduce clutter, and keep the speakers protected from damage.
Michael Evanchuk is a San Francisco-based sound engineer with 20 years’ experience installing, troubleshooting, and repairing commercial, automotive, and household sound equipment. Evanchuk owns an auto stereo center, where he offers highly competitive car audio installation and repair services. He has written dozens of articles on different sound engineering topics, all of which have been published in leading journals, blogs, and websites.


