
Ready to take your car audio game up a notch? Adding an aftermarket amplifier to your factory radio is the perfect way to enhance sound quality and power. We’ve put together this comprehensive guide on how to hook up an amp to the factory radio, walking you through each step of the process so that you get the ideal performance out of your new amp. So if you’ve been wishing for more punch and clarity from your factory speakers, follow along. It’s time to make sure those road trips have great tunes.
Understanding Factory Radios and Amplifiers
Music aficionados who crave a superior audio experience than what factory radios have to offer often seek out aftermarket amplifiers. Most stock head units lack the wattage and sound quality that external amps can provide.
To ensure an optimal listening experience, it’s wise to upgrade your factory car audio system by adding an amplifier.
Power and Audio Signal Requirements for Aftermarket Amplifiers
When installing an aftermarket amplifier to your factory radio, be mindful of two key elements:
1. Power Requirements
You want to ensure that the wattage of the amp matches up with both your speakers’ needs and your receiver’s output capabilities so you can maximize sound quality without causing any damage.
Too little power may lead to a lackluster performance while too much could potentially cause harm – keep this balance in mind when making selections.
2. Audio Signal Requirements
Connecting your amplifier to the line-level outputs is essential for superior audio quality. To make this connection, you’ll need a line output converter (LOC). This device transforms speaker-level signals into lower voltage line-level signals which are more compatible with amplifiers, ensuring clean sound and preventing any distortion issues.
Selecting the Right Amplifier for Your Car
Selecting the appropriate amplifier is essential for achieving superior sound quality. Analyze your vehicle’s audio system and speaker configuration to determine the power requirements, then weigh up your options between Class A, AB, and D amplifiers to find one that suits you best. If space is limited in a smaller car, opt for a compact amp – it could be life-changing.
Gathering the Necessary Tools and Equipment
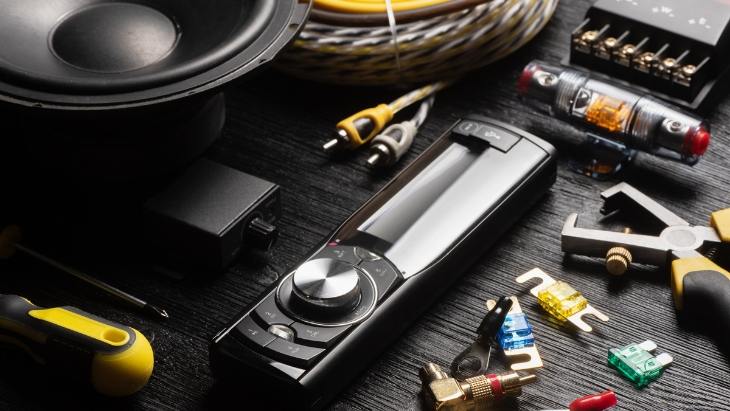
Before you start your installation process, it’s essential to create a comprehensive checklist of the necessary supplies and tools. To ensure a smooth and successful experience, make sure you have the following items on hand:
- Screwdrivers & Socket Set: For panel removal and accessing factory radio/amplifier mounting locations.
- Wire Crimper & Stripper: Properly terminate wires securely with connectors.
- Multimeter: Test electrical connections and verify voltage levels.
- Panel Removal Tools: Carefully remove interior panels without damaging them in any way.
- Torx & Allen Keys (if needed): Certain car models may require these specialized instruments for disassembly purposes.
- Heat Shrink Tubing or Electrical Tape: Insulate and protect all connections accordingly.
Aftermarket amplifiers are essential for integrating your factory radio system with top-notch sound. To make sure that the installation goes as smoothly as possible, wiring harnesses and adapters play a key role in connecting the two components seamlessly. These parts are specifically designed to match up with the connectors of your stock audio system, allowing you to easily plug them in without having to cut or splice any wires. Here’s what you need:
- Amplifier Wiring Harness: Make connections between your amp and radio speaker outputs using convenient plug-and-play connectors.
- Line Output Converter (LOC): Transforms higher voltage, speaker-level signals from your factory stereo into low voltage RCA line-level signals that can be used by an amplifier.
- Amplifier Integration Interface: Ensures full compatibility between aftermarket amps and OEM radios – often preserving special features like warning sounds or chimes.
For optimal sound quality and minimal signal loss, you must select superior audio cables and wiring kits. Here’s what to look for:
- RCA Cables: Shielded and insulated with gold-plated connectors, these are necessary for a seamless audio signal transfer from the LOC to the amplifier.
- Power & Ground Wires: Thick, high-quality wires should be used to provide the current needed by your amp. Oversized wiring will prevent voltage drops so that you get a solid electrical connection.
- Speaker Wire: Quality wire of proper gauge thickness is key in delivering clean power to speakers without compromising on sound quality due to any resistance it may cause.
Preparing for Installation
Step 1: Safely Disconnecting the Car Battery
Before beginning the installation process, it’s essential to safely disconnect the car battery. This mindful precaution avoids potential electrical mishaps and short circuits during work with your audio system. By unplugging the battery, you’ll reduce any risk of shocks or harming your vehicle’s electronics while tinkering with its components.
Step 2: Accessing the Factory Radio and Identifying Connection Points:
Depending on your car model, you’ll need to remove panels and trim surrounding the head unit before we can get started. Consult a service manual or online resources for an easy-to-follow guide tailored specifically for your make and model of car. Now that you have direct access, identify all connection points – including line outputs (when available) and speaker-level outputs which will connect with the Line Output Converter (LOC). With these pieces in place, you’re ready to upgrade.
Step 3: Removing Panels and Trim without Causing Damage:
No matter what type of panels or trim you’re taking off, caution is key. It’s important to be gentle when removing them so as not to cause any damage. For the best results, use specialized panel removal tools or plastic trim removal tools that will help release clips without scratching anything up.
Be sure to take your time with this step—being quick can lead to broken pieces and parts. And don’t forget those screws; make sure they’ve been removed before attempting a pull-off. Handle each piece delicately and you’ll have success in no time.
How to Hook Up Amp to Factory Radio
Step 1: Install the Line Output Converter (LOC)
- Securely mount the LOC away from any heat sources to avoid damage.
- Connect your factory radio’s speaker wires to the appropriate inputs on the LOC.
Step 2: Wire RCA Cables from LOC to Amplifier
- Take one end of an RCA cable and plug it into an output in your LOC.
- Run this cable along your vehicle’s interior, avoiding power cables for minimal interference.
- Plug in the other end of the RCA cable into a relevant input on the amplifier.
Step 3: Secure Power & Ground Cables
- Utilize an amplifier wiring kit to attach the power cable coming from the battery directly to the amp’s power input port.
- Fasten the ground cable onto a solid metal surface near the amplifier for a stable electrical link.
Step 4: Inspect All Connections Carefully
- Examine every connection carefully before proceeding further. Make sure they are secure and insulated correctly.
- Use a multimeter to check the voltage and continuity of connections. Ensure everything is connected as anticipated.
Step 5: Reconnect Car Battery
- Once you have double-checked all links, reconnect the negative terminal of the vehicle battery again.
Step 6: Adjust the Settings on the Amplifier
- Set gain, crossover settings, etc., based on sound system specs as well as personal preferences.
Step 7: Test the Audio System
- Switch on the car stereo and evaluate output quality. Adjust the settings if desired sound level isn’t reached yet.
Final Thoughts
Ready to take your car audio experience up a notch? Follow this guide on how to hook up an amp to the factory radio and you’ll be cruising with crystal-clear sound in no time. Keep safety top of mind, pay attention to the details, and take your time during installation. It’s worth it for the amazing end result. You’ll appreciate every jam even more now that you’ve hooked up an amplifier to your factory radio.
Michael Evanchuk is a San Francisco-based sound engineer with 20 years’ experience installing, troubleshooting, and repairing commercial, automotive, and household sound equipment. Evanchuk owns an auto stereo center, where he offers highly competitive car audio installation and repair services. He has written dozens of articles on different sound engineering topics, all of which have been published in leading journals, blogs, and websites.


