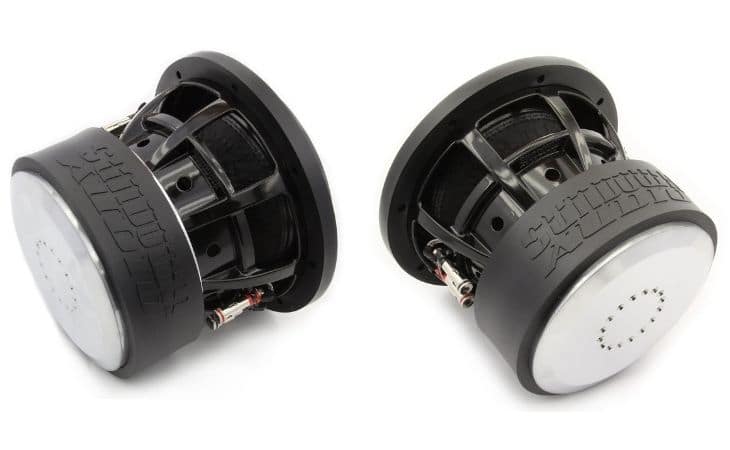
Subwoofers can’t function with an amplifier, and unless you have a powered sub, you’ll need to get an amp to power your unit. Luckily, there are many ways to hook up a subwoofer to an amplifier. Wiring a subwoofer to an amplifier is not necessarily complex, but you may want to take your time to learn before you build your system.
The way your subwoofer(s) is wired to the amplifier determines the resulting impedance, also referred to as nominal impedance. The ideal setup requires that the sub’s impedance and power capabilities match that of the amplifier to optimize output.
The Basics of Subwoofer Impedance
Just like with other loudspeakers, the subwoofer impedance is expressed in terms of ohms. For starters, impedance is defined as the level or amount of electrical resistance/load that a speaker (in this case a subwoofer) puts up against the amplifier output. Generally, subwoofers are often rated at 2 ohms, 4 ohms, or 8 ohms.
It is critical to match the subwoofer load with amplifier impedance for a number of reasons. First off, matching the impedances helps ensure maximum power transfer. Another reason why it is important to match subwoofer load to amplifier’s impedance is to ensure safe operating conditions. In addition, incorrect loads may make the amplifier overheat or even blow up.
As a rule of thumb, the lower the sub’s impedance, the lower the amount of power needed from the amp. However, your systems may encounter hitches when the amp is faced with very little resistance than its power capability. This interaction means more stress on the amplifier and might make it overheat as it tries to emit the extra power.
But there are still some amplifiers that can drive a low impedance load and achieve optimum output. Be sure to check the user manual to establish whether your amp can accommodate a low impedance load.
How to Wire Subwoofer to Amplifier
Most amps are designed to drive a 4 ohms load, but this is going to depend on how the sub is wired i.e., parallel vs series. Parallel wiring is a connection that has the positive terminal connected to the positive end, and the same case applies to the negative ends. On the other hand, a series configuration requires that the positive terminal be wired to the negative end of the other voice coil.
Wiring a dual subwoofer in a series configuration raises the load on the amplifier by up to two times. For instance, a dual 2 ohms sub-wired in series provides a 4 ohms impedance.
The situation, however, changes totally when the same sub is wired in parallel. Instead of raising the resulting load, parallel wiring aims at reducing the impedance of the amp. Essentially, the load on the amp is arrived at by dividing the total impedance by two. So, if you are wiring a dual 2 ohms sub, the total impedance will be 1 ohm.
How to Wire a Dual 4 Ohm Sub to 4 Ohms
In simple terms, a dual/ DVC subwoofer is a subwoofer unit with two voice coils. So, a dual 4 ohms subwoofer will have two voice coils, with each voice coil rated at a 4 ohms impedance. This setup allows you to wire the sub in either a parallel configuration (+ to +, – to -) or a series configuration (+ to -).
So using the above formula, a parallel setup is going to yield an amplifier load of 2 ohms. The reduced load increases the efficiency of the amplifier, and this is why it is easy to see why a 2 ohms sub is more powerful than 4 ohms.
Note: Never attempt to wire a sub with a lower load than what the amp can deliver. By doing so, you’ll be putting the amplifier and/ or subwoofer at risk of permanent damage.
On the other hand, a series configuration is going to raise the impedance level on the amp up to 8 ohms. An increase in impedance or amplifier load decreases the efficiency of the amp and consequently the final output.
So then, how do you wire a dual 4 ohms sub to a 4 ohms amplifier load? From the foregoing discussion, it is practically impossible to wire one dual 4 ohms subwoofer to a 4 ohms amp load. However, you still achieve 4 ohms final impedance by wiring two dual 4 ohms subwoofers using a series-parallel circuit (combination circuit).
To achieve this, you’ll first need to wire the first set of terminals on the voice coils in a series circuit to raise the impedance to 8 ohms. The next thing will be wiring the remaining voice coils in parallel to drop the impedance back to 4 ohms. Once you have successfully wired the subs in a series-parallel, you can then use a multimeter to verify the final load reads 4 ohms.
Parting Shot!
Remember the guidelines we have provided above may or may not be compatible with your specific subwoofer or amplifier. As such, always ensure to check the user manual to determine the ideal impedance before you determine the best wiring option. Also, make sure you observe the correct polarity when making the connection to prevent damage and/or injuries.
Michael Evanchuk is a San Francisco-based sound engineer with 20 years’ experience installing, troubleshooting, and repairing commercial, automotive, and household sound equipment. Evanchuk owns an auto stereo center, where he offers highly competitive car audio installation and repair services. He has written dozens of articles on different sound engineering topics, all of which have been published in leading journals, blogs, and websites.


