
Installing sound-deadening material in your car enhances its acoustic properties. These materials work by insulating the car panels to prevent road noise from interfering with the car music. Road noise includes traffic noise, noise from loud exhaust systems, noisy tires, and car engine noise. They also absorb noise from vibrating car panels. Sound deadeners also ensure that the noise from your car music system does not affect other road users. While it might sound challenging to install sound deadeners in your car, it’s something you can do by yourself. Read through this article and learn how you can install sound-deadening material in your car by yourself.
Locations to Install Sound Deadening Material
Before you start with the installation process, it’s important to know the locations where you should install sound deadeners. Typically, you should install sound deadeners on the door panels, roof, and floor. If you own a station wagon, SUV, or hatchback, then you should also consider installing sound deadeners in the hatch. If you own a sedan, also consider installing sound deadeners in the trunk.
Tools and Supplies Needed

- Sound deadening material- You’ll require enough sound-deadening mats to cover the panels. You may also require acoustic foam for covering the floor of your car. You can also get some foam spray. Foam spray is ideal for insulating hard-to-reach areas where mats may not fit.
- Sound deadener roller
- Panel popper kit
- Screwdriver set
- Denatured alcohol and rags
- Contact adhesion glue (paint or spray type)
Steps to Follow When Installing Sound Deadening Material in Your Car
Upon gathering the necessary tools and supplies, it’s time to get started with the installation process. Here’s how to go about it.
1. Sound deadening the car doors
Here’re the steps you should follow to install sound-deadening material on your car doors:
Step 1- Remove the door panels
First, remove the door panels to access the metallic door sheet. Use a panel popper or flathead screwdriver to pop off the door panel. Next, unscrew the control unit. Also, remove any speaker housing from the door. Peel off any plastic weather covering. Repeat this for all the doors.
Step 2- Clean the metallic door sheets
Upon exposing the bare metallic door sheet, clean it with denatured alcohol and rags. Denatured alcohol dries up quickly and doesn’t leave any residue behind. Besides, it can’t affect wiring. Avoid cleaning the door sheet with water and detergents as water can cause a short circuit in the electrical wiring. Clean the door panels thoroughly to remove any sticky grime or residue on the surface. Cleaning the surface will allow the sound deadener to adhere in place firmly.
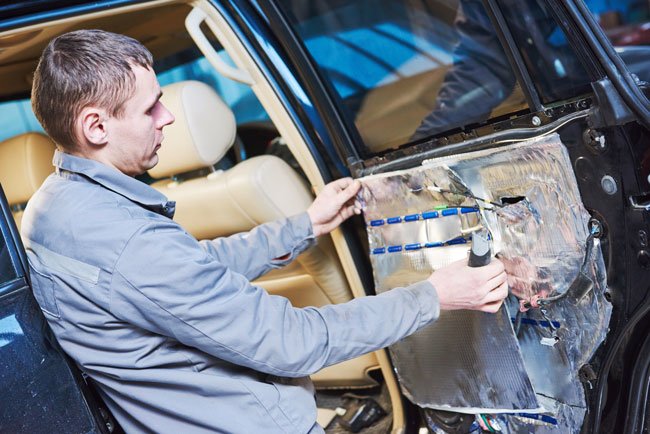
Step 3- Install the sound-deadening material
In case the sound deadener comes in the form of sheets, cut them to a size matching the door panel. If the sound deadener came in a roll, apply enough length and cut off the rest. Mark out the areas for the speaker and door handle on the mat and cut them out. When applying the sound deadener, peel off the back surface to expose the adhesive. If the sound deadener doesn’t come with a self-adhesive surface, then apply contact adhesion glue on the metal sheet. Next, stick the sound deadener mat in place. Use a sound deadener roller to press the mat against the sheet to allow it to stick tightly in place.
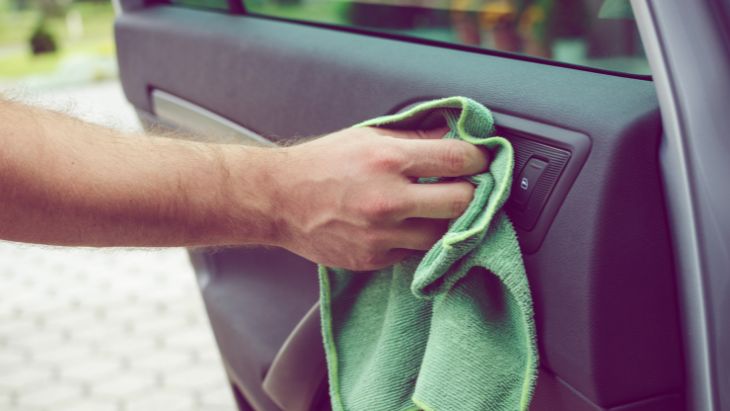
Step 4- Reattach the door panels
Once you apply the sound deadener material to all the doors, reattach the speakers and control unit in place. Also, reattach the door panels in place. Then proceed to the next stage.
2. Sound deadening the Car Floor
Here’re the steps you should follow to install sound deadener material on your car floor:
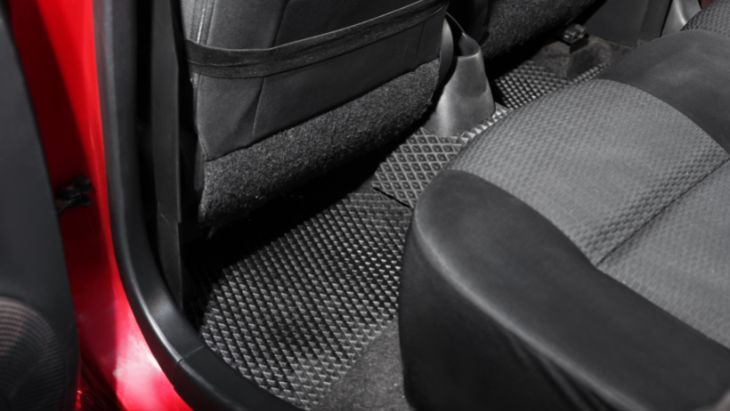
Step 1- Remove any floor mats and carpets
First, remove any mats and carpets on the floor of your car to expose the metallic floor sheet.
Step 2- Clean the floor
The exposed metallic floor sheet may be extremely dirty and covered with grease and grime. It’ll need thorough cleaning with denatured alcohol. Failure to clean a dirty car floor will make the mats fail to stick well in place. They’ll slip out of place and become less effective.
Step 3- Install the sound deadener
Place enough sound-deadening mats on the car floor. Cut off any excess mat. Peel off the back of the mat to expose the adhesive surface and stick the mat in place. Again, if the sound deadener doesn’t come with a self-adhesive surface, use contact adhesion glue. Apply the mat and press it against the floor using a roller to allow it to adhere tightly in place.
Step 4- Return the floor mats or carpets in place
Return any floor mats or carpets you removed in step 1 back to their right place.
3. Sound Deadening the car roof
Follow the steps below to install sound deadener material on your car roof:
Step 1- Remove the roof headliner
Most car roofs are covered with a headliner fabric. It’s typically glued in place. Peel it off carefully to avoid tearing it up. Place it somewhere safe.
Step 2- Clean the roof
Use denatured alcohol to clean the exposed metal roofing. Doing so will remove any grime and adhesive residue.
Step 3- Install the sound-deadening mats
Apply enough sound deadener mats on the roof. Cut off any excessive piece. If the sound deadener material doesn’t have a self-adhesive surface, apply contact glue on the roof and apply the mat. Again, use the roller to stick the sound deadener firmly in place.
Step 4- Reattach the roof Headliner
Next, apply contact glue to the sound deadener. Next, stick the roof headliner over the sound deadener.
4. Sound Deadening the trunk or hatch
You should also install sound deadener material in your car’s trunk or hatch. Simply follow the steps below:
Step 1- Remove any fabric covering the side panels and floor carpet
First, remove any fabric that may be covering the side panels of your car’s trunk or hatch. Also, remove any floor carpet or mats on the floor to expose the metallic floor sheet.
Step 2- Clean the panels
Clean the exposed metallic sheet on the side panels and floor with denatured alcohol.
Step 3- Apply the sound deadener on the panels and floor
Peel the paper covering the self-adhesive on the mat and apply enough mats on the side panels and floor. Again, if the mats don’t have self-adhesive glue, apply glue to the panels and floor. Then install the mats. Remember to press them against the panels and floor using the roller.
Step 4- Reattach any fabric and floor carpets removed
You can now reattach any fabric on the side panels and floor carpet you removed in the first step.
5. Sound deadening hard to reach areas
A car typically has many hard-to-reach areas that allow noise to get into the cabin. Some of those areas may not fit regular sound-deadening mats. In this case, take advantage of acoustic foam spray to insulate those areas against noise. The foam spray will dry up quickly and form a layer of insulation against noise.
Conclusion
Insulating your car against noise will allow you to enjoy listening to your car music system with less unwanted noise. You’ll also get to make wireless phone calls in a quieter car cabin. Besides, sound deadeners will make your car cabin more comfortable since they also work as heat insulators. As you can see, installing sound-deadening material in your car is something you can do by yourself. Thus, save some money and go the DIY route rather than paying hundreds of dollars for the installation of sound deadening material to improve your car’s sound quality.
Michael Evanchuk is a San Francisco-based sound engineer with 20 years’ experience installing, troubleshooting, and repairing commercial, automotive, and household sound equipment. Evanchuk owns an auto stereo center, where he offers highly competitive car audio installation and repair services. He has written dozens of articles on different sound engineering topics, all of which have been published in leading journals, blogs, and websites.


