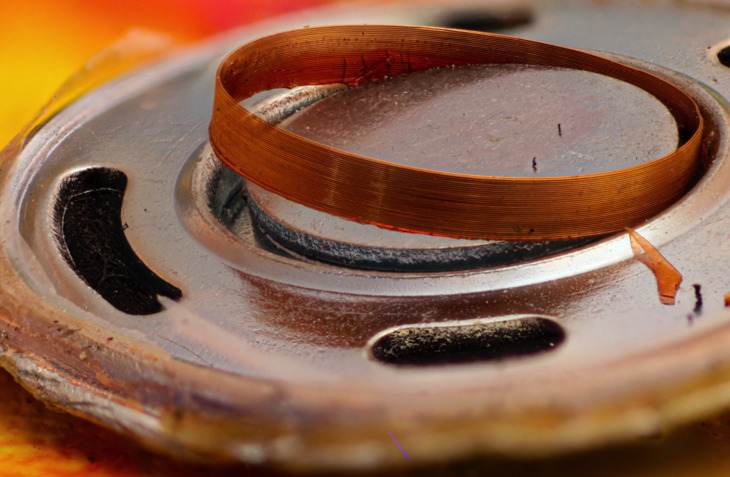
A dual voice coil (DVC) is commonly used in some subwoofers. Although a single voice coil (SVC) is relatively similar to a dual voice coil, they differ in terms of wiring. Essentially, SVC features two wiring posts, with one being the negative terminal and the other one a positive terminal. On the other hand, a DVC features four wiring terminal posts. In DVC, there’re two negative terminals and two positive terminals.
The extra terminal posts in DVC offer more options to wire the subwoofer to an amplifier. However, wiring dual voice coil is relatively complex. A DIY audiophile may find it quite intimidating to wire a subwoofer with DVC to their car amp. Fortunately, we’ve prepared this article to help you with the process of wiring DVC.
Advantages of Dual Voice Coil
Before we discuss how to wire DVC, it’ll help to discuss some of its advantages and disadvantages. Its advantages include:
1. Matching amplifier and subwoofer impedance
When wiring multiple subwoofers to one amplifier or bridging two mono channels, the impedance load on the amplifier will depend on whether you wire the subs in parallel or series. With a DVC, you can have several wiring options such that you can wire them in a way that the total load matches the minimum load that the amp can handle.
2. Maximum amplifier performance
Today, most car amps have different power ratings depending on a certain speaker load. For instance, you may have a speaker rated as 1000 watts RMS at 1 ohm, 500 watts RMS at 2 ohms, or 300 watts RMS at 4 ohms.
If you use a single voice coil setup with one subwoofer, you’ll only get up to 500 watts RMS at 2 ohms. If you add another SVC subwoofer and connect them in parallel, it’ll mean spending more money to buy a second subwoofer. Also, adding a second subwoofer will take up more space.
However, a single 2-ohm dual voice coil subwoofer can get 1000 watts RMS at 1 ohm for maximum performance. In that case, you’ll wire it in parallel to allow the amplifier to output its maximum power. Thus, you’ll save on installation space and the cost of investment.
3. Ideal for both home and car stereo
Generally, 2 and 4-ohm car subwoofers aren’t ideal for use with a home stereo system as they can cause the amp to shut down or overheat. Also, 8 ohm home subwoofers aren’t ideal for use with most car audio systems. However, with a dual voice coil sub, you can wire it in series to get 8 ohms for home use or wire it in parallel to get 2 ohms or as a single sub to get 4 ohms for use in your car stereo.
4. Connecting several subs to one amp
While it’s possible to bridge some amplifiers to allow you to connect multiple subwoofers to one amp, it’s not possible to bridge some amps. If you want to connect several SVC subs to an amp that can’t be bridged, you’ll need to buy a second amplifier. However, with DVC, you can connect several subs to a single amp.
Disadvantages of Dual Voice Coil
Dual voice coils are largely great. However, their only noticeable disadvantage is that they’re relatively more expensive then single voice coils. Regardless, you get more advantages over SVC despite the higher price range.
Wiring Dual Voice Coil Subwoofers in Parallel
When wiring a DVC subwoofer in parallel, you’re simply reducing the impedance. If you wire several subs in parallel to the same amp, you’re splitting the voltage that each subwoofer receives.
Wiring a single DVC subwoofer in parallel
Step 1- Connect the positive terminals together with a speaker wire. Next, wire the connected positive terminals to the amplifier’s positive output port.
Step 2- Connect the negative terminals together. Next, connect them to the amplifier’s negative output port.
Wiring two DVC subwoofers in parallel
Step 1- Connect all the positive terminals of the two subwoofers together. Then connect them to the positive terminal output on the amplifier.
Step 2- Connect all the negative terminals of the two subwoofers together. Then connect them to the negative terminal output on the amplifier.
To calculate the impedance of subwoofers with a similar impedance rating when wired in parallel, divide the impedance rating of one subwoofer by the total number of subwoofers connected together. For example, if you’ve connected two 4-ohm DVC subs in parallel, divide 4 ohms by 2 to get a load of 2 ohms.
Wiring Dual Voice Coil Subwoofers in Series
When wiring subwoofers in series, you’re increasing their total impedance. To calculate the total load, add the impedance of all the subwoofers connected in series. However, the challenge with wiring subwoofers in series is that if one of the subwoofers malfunctions, all other subwoofers will fail. The rest of the subwoofers will only work when you remove the faulty subwoofer and reconnect the remaining subwoofers again.
Wiring a single DVC sub in series
Step 1- Connect the positive terminal of the first voice coil to the positive output terminal of the amplifier.
Step 2- Connect the negative terminal of the first voice coil to the positive terminal of the second voice coil.
Step 3- Connect the negative terminal of the second voice coil to the negative output terminal of the amplifier.
Wiring at least two DVC subs in series
If you want to wire at least two dual voice coil subs in series, use the steps above. Then add the second, subwoofer by connecting the negative terminal of the first voice coil to the positive terminal of the third voice coil and so on.
Wiring DVC in Parallel and Series
If you’re dealing with four 4-ohm DVC subs, you can wire the voice coils of each subwoofer in parallel. Then wire all the four subwoofers in series to the amplifier. That way, you’ll get optimal impedance for the best performance.
Conclusion
If you’ve invested in a dual voice coil subwoofer, it’ll help to know how to wire it to your subwoofer. In this guide, we’ve shown you that it’s not very complex to wire dual voice coil subs. It’s something you can easily do by following our tips. Hopefully, you’ll no longer struggle to wire your DVC subwoofers after reading through this guide.
Michael Evanchuk is a San Francisco-based sound engineer with 20 years’ experience installing, troubleshooting, and repairing commercial, automotive, and household sound equipment. Evanchuk owns an auto stereo center, where he offers highly competitive car audio installation and repair services. He has written dozens of articles on different sound engineering topics, all of which have been published in leading journals, blogs, and websites.


